
Ricordi la sensazione dello slime? Fresco, viscido, piacevole al tatto? Lo slime ha un effetto calmante, è semplicemente una fantastica esperienza tattile. Ma questo è solo uno dei motivi per cui lo slime sta vivendo un grande revival. Lo slime è di moda, e non solo tra i bambini. Ma come si fa lo slime?

Che si tratti di grandi o piccini, quasi tutti si sono divertiti con lo slime per un po’. Le esperienze indescrivibili con questo materiale appiccicoso e scivoloso dovrebbero essere conosciute da ogni bambino. Sarà ancora più emozionante se preparerete lo slime insieme ai vostri bambini.
Lo slime si prepara abbastanza rapidamente. Probabilmente avete già gli ingredienti a casa: gli ingredienti principali sono la colla e il detersivo.
Abbiamo raccolto la ricetta base dello slime e quattro ricette individuali per diversi tipi di slime. In questo modo il vostro slime si trasformerà in un magico budino glitterato o in un colorato slime unicorno. Abbiamo anche preparato una ricetta alternativa senza colla.
Per i bambini è un’esperienza emozionante poter partecipare alla creazione dello slime. È divertente e istruttivo sperimentare con ingredienti diversi e trovare la consistenza perfetta. Cosa succede se aggiungo schiuma/crema da barba? O un po’ più di colla o meno detersivo?
Detersivo, colla, soluzione per lenti a contatto… questi ingredienti sono pericolosi per mio figlio? Naturalmente, la colla idrosolubile e il detersivo non sono generalmente privi di pericoli, ma se i bambini si lavano le mani dopo aver giocato, di solito si può stare tranquilli. Per le pelli sensibili si consigliano guanti monouso.
Alla fine di questo articolo troverete una ricetta per lo slime che non richiede colla o detersivo. Qui potete cavarvela con shampoo e amido di mais.
Partendo dalla ricetta base, è possibile produrre in seguito tutti i tipi speciali di slime. Quando si mescolano gli ingredienti è importante lavorare sentendo la consistenza. A seconda del prodotto di partenza e della consistenza desiderata, a volte sono necessarie proporzioni leggermente diverse.

Ingredienti per lo slime base perfetto
• Colla liquida per lavori manuali (idrosolubile e priva di solventi, deve contenere PVA)
• Detersivo liquido
• Colorante alimentare
• Eventualmente un po’ di liquido per lenti a contatto
• Eventualmente un po’ d’acqua
• Per pelli molto sensibili, durante la preparazione è consigliabile indossare guanti monouso
1. Per prima cosa versare la colla liquida in una ciotola “carlotta”. Se si desidera ottenere uno slime trasparente, utilizzare colla trasparente. La colla bianca è adatta per uno slime coprente. Per una porzione di slime delle dimensioni di una mano è sufficiente un normale tubetto di colla (circa 125 ml). Alcuni aggiungono un po’ di acqua tiepida alla colla per renderla più liquida.
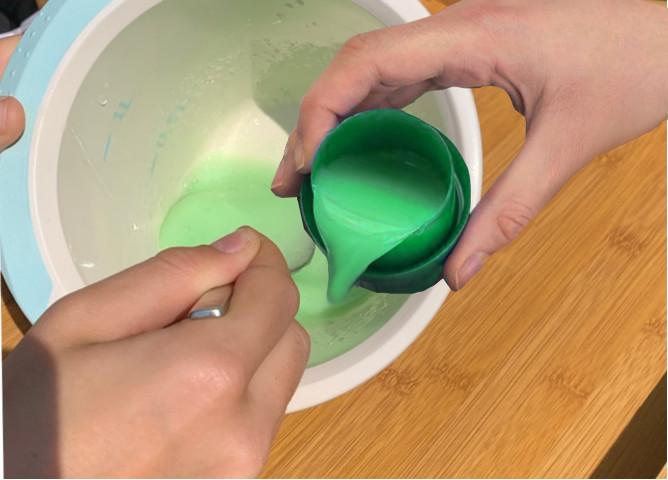
2. Aggiungi ora il detersivo. Inizia con circa 2 ml, il modo migliore è usare il misurino piccolo “massimo”. Il rapporto giusto dipende dal detersivo e dalle tue preferenze.
Di norma, più detersivo usi, meno viscoso e più morbido sarà lo slime. Se usi un detersivo colorato, lo slime avrà già un colore. Altrimenti, puoi aggiungere del colorante alimentare.
3. Mescolate con un cucchiaio fino a quando il composto forma un grumo. Poi impastatelo con le mani fino a ottenere la consistenza giusta. Lo slime è pronto quando non si attacca più. Se lo slime non si lega e non si attacca correttamente, aggiungete un po’ di detersivo o di liquido per lenti a contatto.
Suggerimento: se volete conservare lo slime, mettetelo in un contenitore ermetico, come una scatola per alimenti “fredo fresh”.
Con glitter e altre aggiunte, come piccole perline, puoi creare bellissimi effetti. Con il colore fosforescente il tuo slime brillerà al buio, con il colorante alimentare puoi colorare la massa in diversi colori e poi attorcigliarla per ottenere uno slime arcobaleno.
Se vuoi che lo slime sia particolarmente soffice, usa mezza bomboletta di schiuma/crema da barba e 1-2 ml di soluzione per lenti a contatto al posto del detersivo.
Per la ricetta alternativa dello slime hai bisogno di shampoo e amido di mais
Ingredienti per lo slime alternativo allo shampoo:
• un po’ di shampoo
• amido o amido di mais
• diversi coloranti alimentari
• una ciotola (ad esempio la ciotola per impastare carlotta)
• un cucchiaio per mescolare
Ecco come si fa:
1. Per prima cosa, versate 120 ml di shampoo in una ciotola. La quantità è importante, perché il rapporto con l’amido di mais deve essere corretto. Più lo shampoo è denso, migliore sarà il muco. Per misurarlo è utile il misurino “massimo”.
2. Aggiungete ora circa 280 g di amido di mais e mescolate bene con un cucchiaio. La pastella di shampoo fatta in casa è ora abbastanza densa.
3. Aggiungi un cucchiaio d’acqua e mescola bene il composto. Ora puoi variare la consistenza dello slime aggiungendo un po’ più d’acqua a piacere.
4. Impasta lo slime con le mani fino a quando non avrà assorbito completamente tutta l’acqua e l’amido. Puoi capire quando lo slime fatto in casa è pronto dalla consistenza che senti tra le mani.
Continua a giocare!


